5 Creative Christmas Card Display Ideas

By Hallmark staff on October 29th, 2020
Holiday card display

Holiday card season is here: Our mailboxes are about to fill up with festive envelopes with pretty stamps and familiar handwriting. So we challenged Hallmark stylists to come up with fun ways to display all those cards—especially the ones featuring adorable photos of our friends and families. Read on for five DIY Christmas card display ideas you’ll love.

Holiday card display
#

Candlestick

Candlestick 1

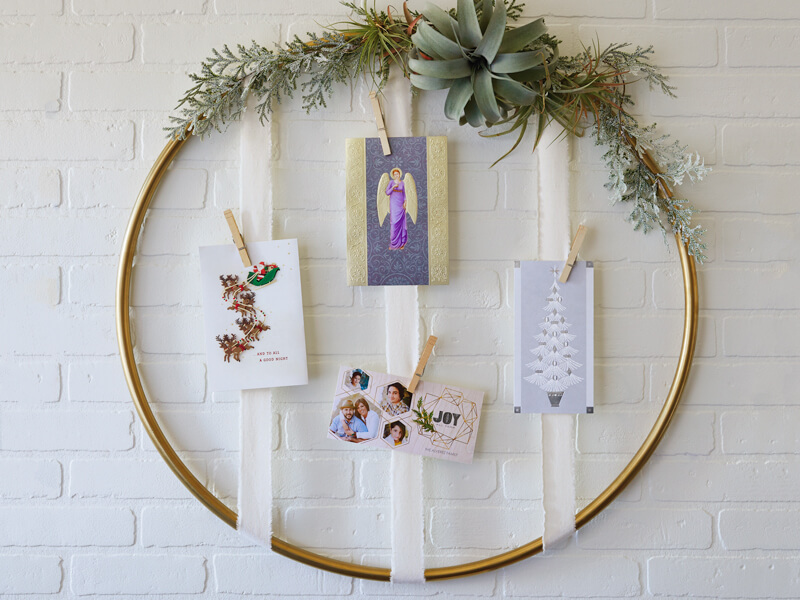
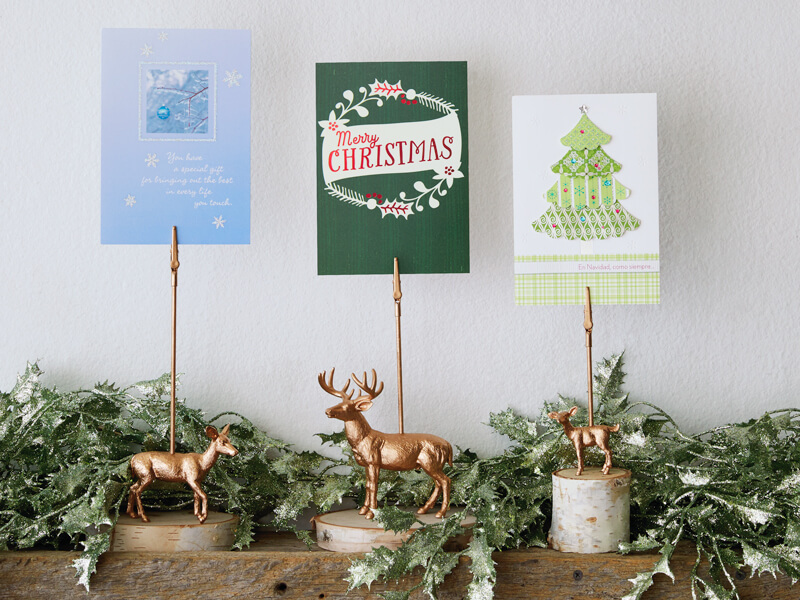
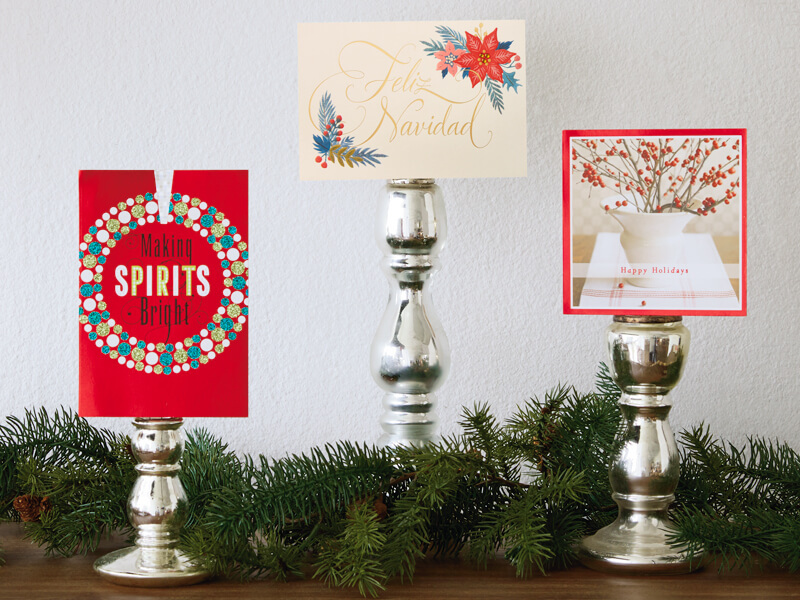
This is a great excuse to get out those gorgeous candlesticks you almost never use to display your favourite Christmas cards.

Supplies

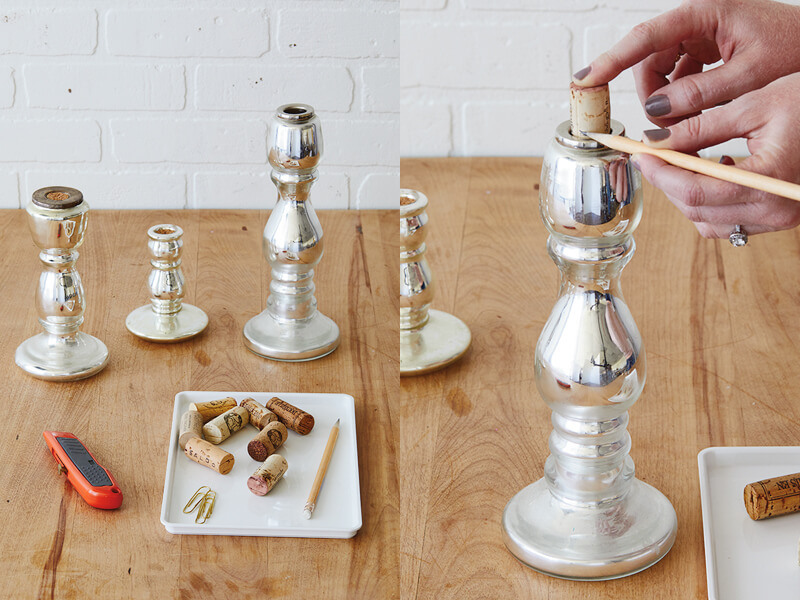
  • Candlesticks for taper candles (Use family pieces, thrifted or store-bought—you’ll still be able to use them for candles. Heavy-bottomed pieces work best.)
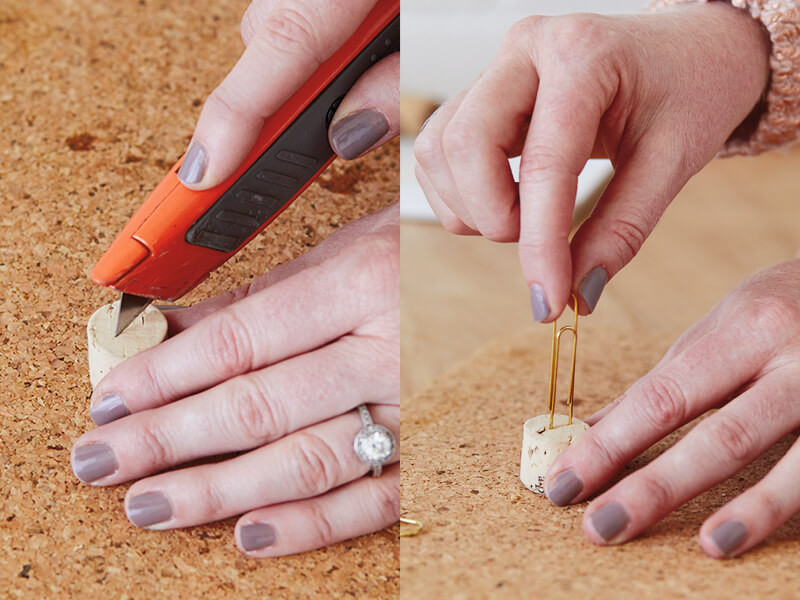
  • Used wine corks
  • Pencil
  • Utility knife
  • Cutting surface
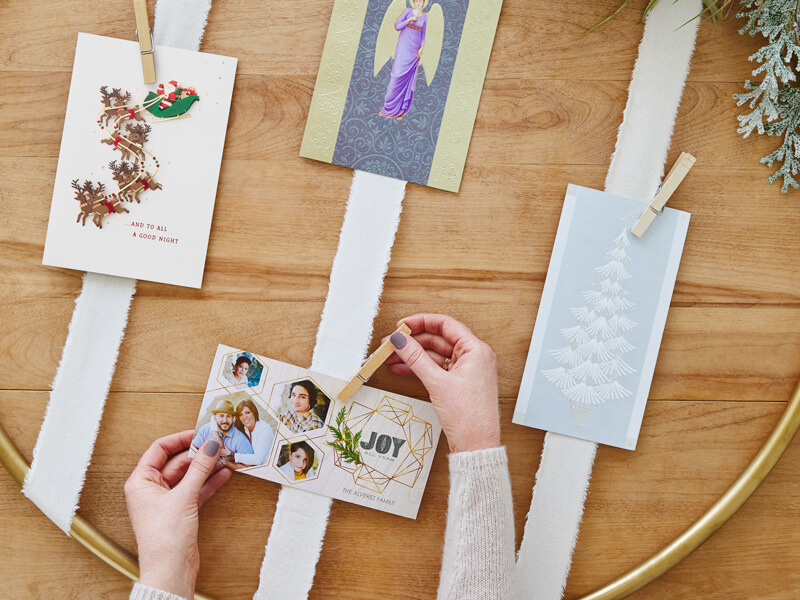
  • Sturdy, pretty paper clips

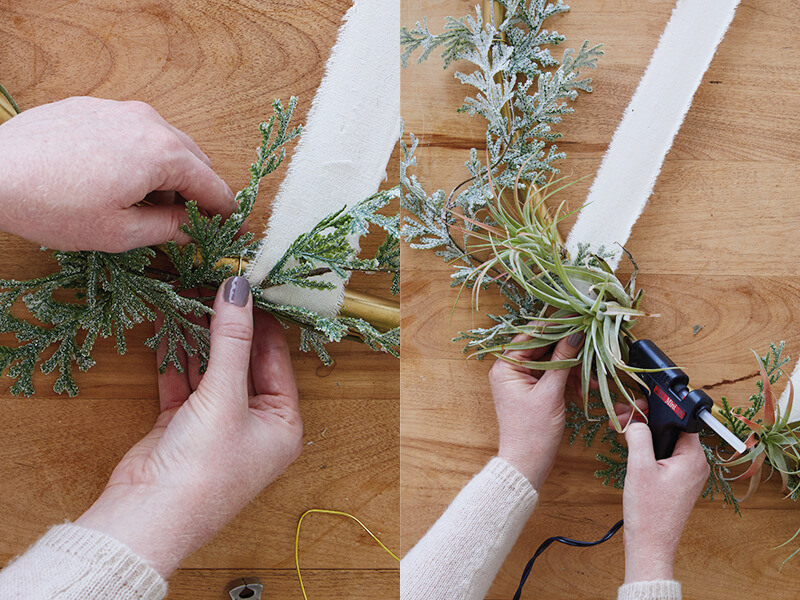
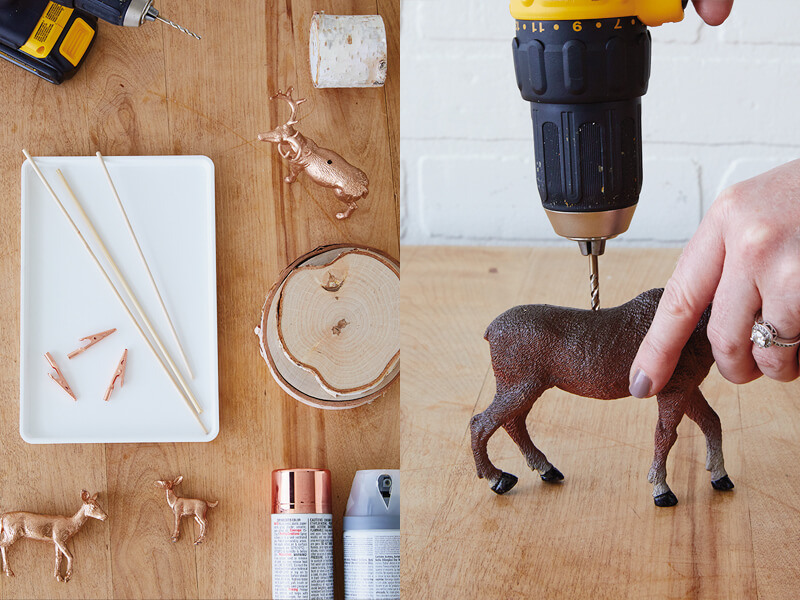
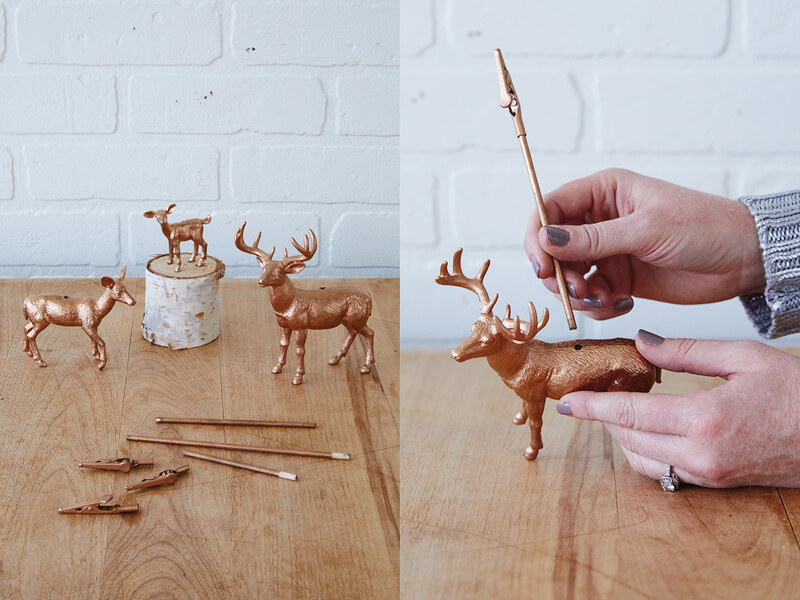
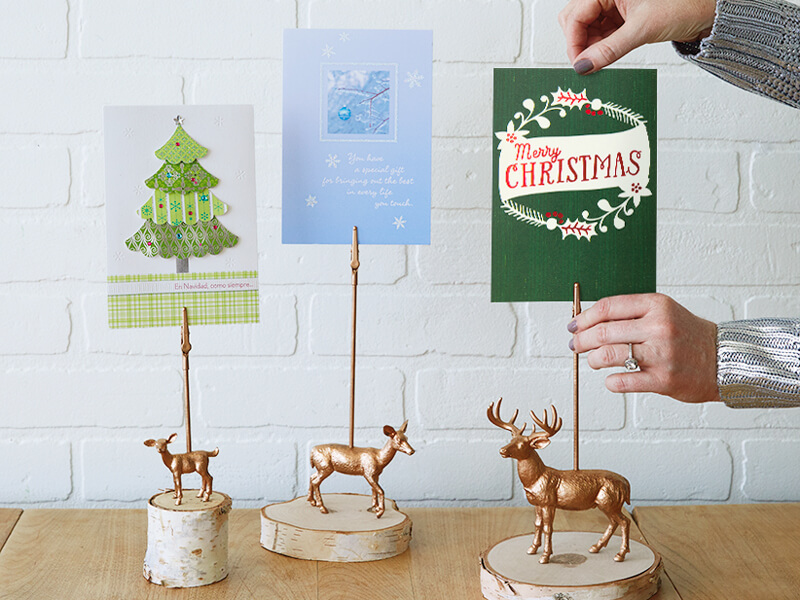
How to make a candlestick Christmas card holder

Candlestick 2
  1. Place a cork in the candlestick and mark the top of the candlestick with a pencil as shown.
  2. Put the cork on a cutting surface and carefully cut at the mark using a utility knife.
Candlestick 3
  1. Make a small cut in the center of the uncut end. It should be just large and deep enough to insert your paper clip.
  2. Push a paper clip (double-loop side up) into the slit on the cork. The fit will be snug.
  3. Pop the corks into the candlesticks and put your favourite cards in the paper clips.
#

Gold hoop

Wreath 1

The best use ever for that hula-hoop sitting in your garage: A giant wreath to display holiday greetings.

Supplies

  • Hula hoop
  • Primer (like Rust-Oleum)
  • Metallic spray paint (we used Krylon Foil Metallic Gold)
  • Fresh or faux greenery or succulents, or air plants
  • Ribbon or fabric strips
  • Hot glue gun and glue sticks
  • Brass wire (optional)
  • Wooden clothespins

How to make a gold hoop Christmas card display

Wreath 2
  1. Prime and spray paint the hula hoop, following manufacturer’s instructions.
  2. Mark the center top and bottom of the hula hoop and cut a ribbon to fit with enough extra to wrap around the back side for gluing. Cut two more pieces of ribbon to fit on either side.
Wreath 3
  1. Glue one end of each ribbon to one side of the hoop. Pull tight and glue the other end to the other side.
  2. Use the brass wire (for fresh greenery) or the glue gun (for the faux stuff) to attach greenery to the top of the hoop. Start with the “base” greenery, then attach focal pieces to finish.
Wreath 4
  1. Hang cards on the ribbon using clothespins.
  2. If you’d like, make a loop for hanging using the brass wire and attach it to the top of the wreath, hidden in the greenery.
#

Gilded deer

Deer 1

Flora, meet fauna. Birch slices and toy deer come together easily to make these whimsical card holders for your favourite Christmas greetings.

Supplies

  • Toy deer family
  • Alligator clips with barrel
  • 1/8” wooden dowel
  • 1/8” drill bit
  • Drill
  • Flush cutters or utility knife
  • Spray primer (like Rust-Oleum)
  • Metallic spray paint (we used Krylon Foil Metallic Copper)
  • Birch slices
  • Superglue

How to make gilded deer Christmas card holders

Deer 2
  1. Drill a hole at the center of the back of each deer. (Be sure to keep the bit straight.) If this feels weird, remind yourself it’s a plastic deer.
  2. Insert the dowel and use the flush cutters to cut it to your desired height.
Deer 3
  1. Prime and spray the deer/dowel/alligator clip combo. As you can see in the photos, you can spray paint each piece before assembly. But after trying it, we decided it’s easier to spray paint them once you’ve put everything together. (Oh, and do not skip the primer. You will be tempted to. Don’t.)
Deer 4
  1. Attach alligator clip to the dowel and insert it into the hole on the back of the deer. If this still feels strange, apologize quietly to the deer as you complete step three.
  2. Glue each deer’s hooves to a birch slice. (Remind yourself the deer cannot feel this.)
  3. Insert your cards into the alligator clips.
#

Chalkboard

Chalkboard 1

If you’ve got a chalkboard—or a chalkboard-painted wall—we’ve got a way to turn it into a display for your Christmas cards. (And it can go right back to grocery and to-do lists in January.)

Supplies

  • Chalkboard or chalkboard-painted wall
  • White chalk
  • Ruler
  • Paper star (use craft paper, an old greeting card or construction paper)
  • Removable adhesive strips or poster tape
  • Washi tape
  • Miniature garland

How to make a chalkboard card display

Chalkboard 2
  1. Use the chalk and a ruler to draw triangles to make a Christmas tree (or freehand your own).
  2. Attach the star with the removable adhesive strip.
  3. Attach your mini garland to the chalk tree with washi tape.
  4. Tape cards onto your “tree” to display them.
Pro tip: It’s easy to make your own mini garland:
  1. Cut twine to the length you want.
  2. Cut a long, 2” wide strip of gift wrap. Fold it in half lengthwise.
  3. Cut little triangles out of the length of gift wrap—make sure you use the folded edge of the base.
  4. Unfold the triangles and dab some glue along the inside of the fold.
  5. Fold the triangles over the twine.
#

Wooden ladder

Ladder 1

We love old wooden ladders—they’re great for hanging towels and blankets or, you know, reaching things on high shelves. We repurposed this one to show off some holiday cards.

Supplies

  • Wooden ladder
  • Greenery
  • Garland (just about any style will work)
  • Wire to attach garland and greenery
  • Binder clips (we used gold metallic)

How to make a wooden ladder Christmas card holder

Ladder 2
  1. Wind your garland around the handrails and through the rungs. Use wire to attach it if needed.
  2. Add greenery or other accessories.
  3. Use binder clips to attach cards.

Credits: Photography and styling by Hallmark’s Union Hill Photo Studio.