- Get the free printable. Download and print the DIY Dinosaur Valentine Box template.
- Sketch the head, tail and plates on scratch paper, then trace onto paperboard. Cut them out with a craft knife. Cut long strips from the corrugated cardboard to form the sides of the head and tail.
- Build the head and tail. Tape the two sides of the dinosaur’s head to the strip of corrugated cardboard as outlined in the downloadable. Repeat for the tail.
- Make a mail slot. If you used a tissue box, you already have a mail slot! If not, cut one out (carefully) with a craft knife.
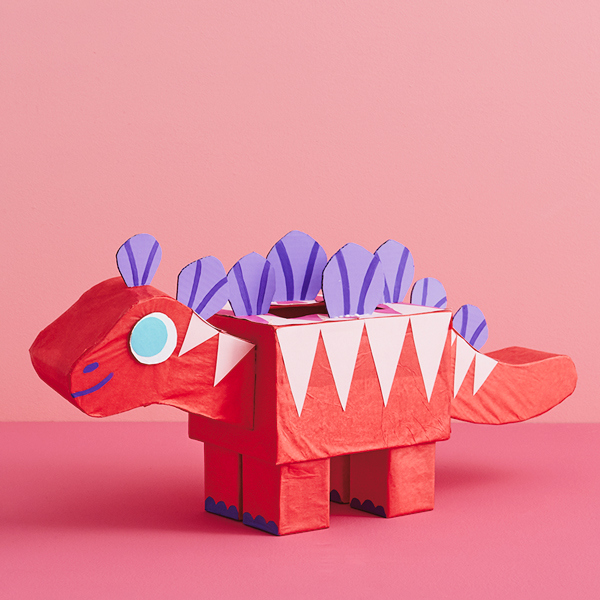
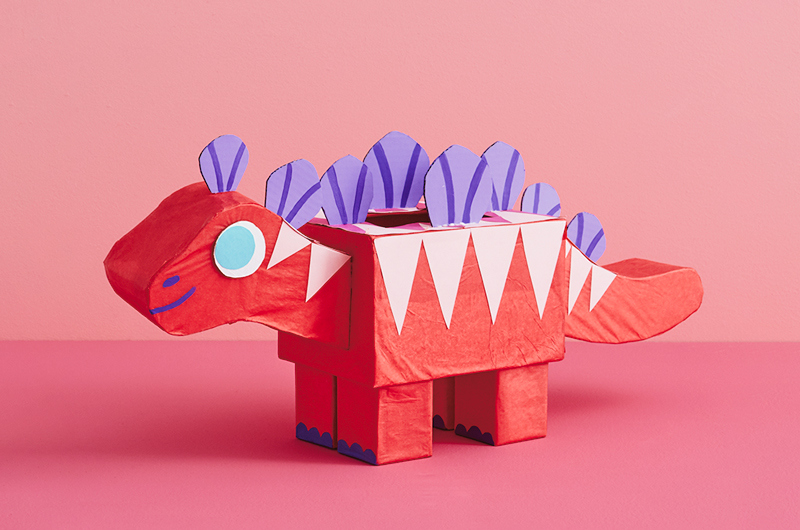
- Add colour. Paint the head, tail, body and feet. Or cover them with tissue or wrapping paper. Paint or cover the back plates in a contrasting colour.
- Add a face. Make eyes by cutting out two white paper circles and two smaller paper circles in a different colour. Glue them on, and draw or paint on nostrils and a mouth on each side of the head.
- Decorate the body. Have fun with your dino buddy! Give him or her scales, stripes, spots or other decorations. (May we suggest hearts?) Paint toes on the feet.
- Put it together. Use hot glue to attach the feet to the body. Then add the head and tail. Finally, add the back plates, starting from the tail and working your way up to the head.
Ready to roar!
Tip: Start with a box big enough to hold lots of valentines and go from there. Our dino is built around a basic cardboard box.