How to Decorate a Christmas Tree: Professional Styling Tips on Lights, Ornaments and More

By Melvina Young on November 2nd, 2022
15981 Tree MC2

It’s about to get lit, y’all! That’s right, we covered how to pick a Christmas tree in our last article, but now it’s time to make your tree show up and show out! You’ve scouted out your space, decided on the size and nature (or faux nature) for your tree, gotten it through the front door and now you’re ready to level up your look.

Whether this is your first tree or you’ve been in the holidaying game for a while, it’s time for your Yuletide glow-up.

Did you miss part one of this two-part series? You can catch it here!

15981 Tree MC2
#

1. How to Choose a Christmas Tree Theme: Find Your Creative Joy!

15981 Tree 7

Before you start frolicking in the craft store aisles among the piles of bows and miles of ribbon (don’t even act like it’s just me), I want to ask you a simple question: How do you want your Christmas tree to make you feel?

You’re probably saying, “Happy, Mel! Okay? Now, can we please get to it?”

Hold up! Let’s talk more about this happy. Happy is good. Happy is essential. Happy is so stinking happy! So let’s talk about the kind of happy you need from this tree:

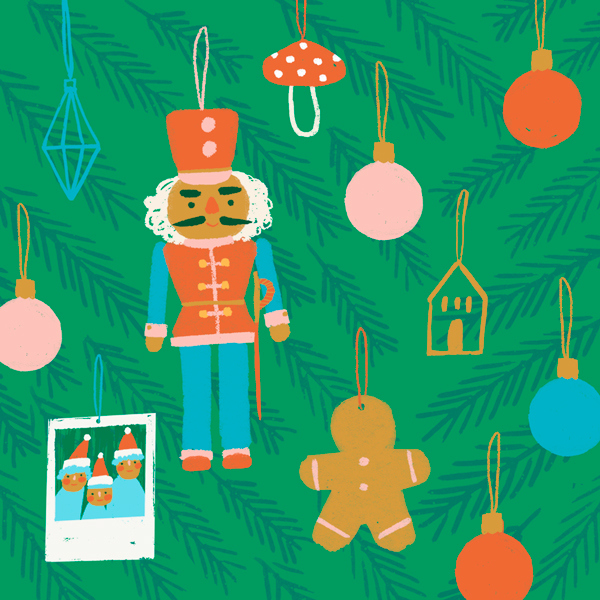
  • Would you like a tree that makes you feel nostalgic for your childhood or Christmases past? Something that could give you that “simpler times” feeling? Think tinsel, popcorn strings, peppermint sticks or ornaments you cherish from your mom or grandma.
  • Maybe you’d like your tree to have a bit of whimsy and fun. You could add vintage or modern paper or lace snowflakes, tuck in elves or reindeer or gift boxes with bright colours.
  • Maybe you’d like something elegant and classic—think of using gold, silver, platinum or pearls. You know…something that would earn you a big chef’s kiss from Oprah or Martha or Melvina.
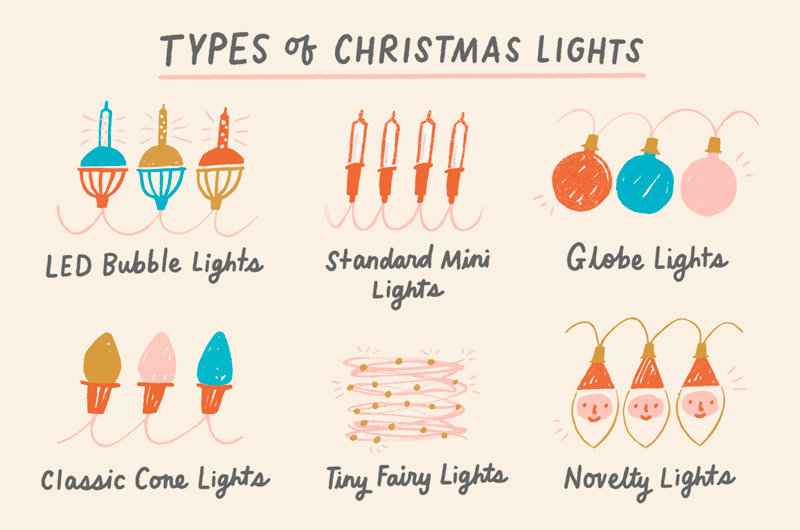
  • Do you like subdued lighting or trees that could potentially be seen from outer space?
  • Do you like unexpected elements in your tree, or do you like to stick with strictly traditional?

This last one is me. Every year, I want my upstairs trees to have surprising elements of joy, magic and glamour. (Yes, I did just say “upstairs trees.” We’ll be talking about my downstairs trees, too. I have 14 total, and they all have names.) So I typically add extra lights to my pre-lit trees, use simple but unique and elegant ornaments, and add floral arrangements to make whatever statement I decide on.

Basically, what’s your vibe? Once you decide on your kind of happy, you can ask yourself if you like trees that look clean and crisp or ones that are stuffed with lights, ornaments, ribbons and bows.

Remember, this tree is your statement of joy. Make it however you want to.

Spend a little time ideating. Whether you decide to grab inspiration from the natural world outside your door or emulate ideas from Christmas shop windows, holiday catalogues and video, the virtual world or real life, find what feels good to you and pull together your own vision.

#

2. A Small Safety Tip: Bag Your Tree

If you have small children, climbing pets or a clumsy partner or spouse, consider bagging your tree with either literal sandbags or something heavy on the base to hold it down and keep it from tipping over. Seriously, this step keeps your family safer and your Christmas unspoiled.

If you have a shorter tree (5 feet and under) you could consider putting it on a pedestal and tethering it to the wall the way you would a TV or chest of drawers to keep it secured for tiny climbers. But if you have a taller tree, trust me on the sandbag thing. And no worries!—I have some good ideas for camouflaging your tree base with beauty that I’ll share later.

Pro tip: Fluff! Now that you’ve grounded your tree, set it up for more success. If you have a live tree, give the boughs and needles a day or so to settle so that you can see the positive and negative spaces you have to work with.

If you go with a play tree, pull the boughs out and spend some time pulling the needles away from the bough and toward you, working in a v-formation, so that everything looks more natural.

#

3. Lighting a Christmas Tree: Lights Please!

15981 Tree 4

To me, lights are everything. EV-E-RY-THING. Lights help create the mood and the magic of Christmas. You can find an array of shapes, sizes, types of bulbs and even different degrees of warmth or coolness for your tree.

In fact, there are so many possible expressions that you’d do yourself a favour by making good friends with your local hardware store clerk and sharing your needs.

But here are some basics…

Make sure you have enough lights.

The CTPs (Christmas Tree Pros) will tell you that a good rule of thumb is to have 100 lights per foot of tree. So if you have a 6-foot tree, you’d want 600 lights. But feel free to experiment and go bigger than that. (That way it won’t just be me out here going bigger than that.)

If your tree is unlit, decide if you want to add clear lights, coloured ones or a mix.

If you’ve got littles at home, coloured lights will absolutely thrill them and get you a big “W” in the memory-making game. You can buy coloured lights as retro-feeling LED bubble lights, regular-size bulbs or tiny fairy lights. Layering on some of each can make a magical mix.

But if the shimmering golden glow of clear lights pleases, delights and peaces you out, go for it. Add as many strands as feel good. Boom! Seasonal self-care. I see you.

If your tree is pre-lit, you can make the same choice—clear or coloured.

Now some play trees have both types of light, which you can alternate or turn on at the same time. You may be satisfied with the warm and clear LED light and/or jewel-coloured light already emanating from the bough tips.

But if you want to build more shine into your tree…

You can also add golden-light incandescents that produce a lovely glowing effect. Or LED strings of jewel-tone illumination. You can also add bubble bulbs that give off bursts of light or fairy lights to add a twinkling quality to your overall look.

The best way to put Christmas lights on a tree

After you’ve made your lighting choices, don’t just run the strings around the tree in rings—that won’t give you the best or prettiest effect. Instead, try wrapping lights around the branches back and forth.

Start at the trunk or centre of the tree and wrap each branch moving towards the tips. Then move back towards the trunk to start on another branch. This will help the tree look lighted all the way through instead of just in loops around its circumference.

Pro Stylist Tip from Nicole: As you wrap your boughs in light, stop, stand back a couple of feet and squint. This is her professional tip for assessing as you go, blurring the details for a few seconds so that you can see the whole effect. Try to add more light to the back of the tree for fullness and roundness.

#

4. Christmas Tree Decorations: Gettin’ Pretty with Ribbon, Embellishments and Toppers

15981 Tree 5

Time to help your tree show up and show out! This is where you bring different elements together to make your joyful statement.

Tree Topper Ideas

If you want, you can start at the top with your tree topper. (I do mine last. But there are good reasons to start here.) If a store-bought star or angel is your jam, go ahead and crown your tree with it. And there are lots of fun themed toppers (like Star Wars, Star Trek or Harry Potter) available now.

But you can easily make a topper that feels more personalized. For instance, I like big florals for my upstairs treetops—these floral arrangements give my trees a fresh, glam, luxe look.

I’ll pull together a monochromatic bouquet of white southern magnolias, peonies, roses and other blooms that appeal to me, pairing them with gold or platinum leaves to match my ornaments. I arrange the flowers how I’d like them to look on the tree and stick them in accordingly, fastening with green or coloured floral wire. You could use two bouquets for a smaller tree, four for a mid-size tree, and six for your tallest trees.

Or think about placing a pretty dove or red cardinal or two on your treetop. In fact, mix and match. Birds and florals go beautifully together. Maybe you have some big and beautiful statement jewellery you could use. The important thing is to do you

Ribbon

If you like a more filled-in tree, you could start your Christmas tree decorations with ribbon. Ribbon can add everything from elegance to edge to your tree. And you’re blessed with choices, chile! Everything from colour and pattern, to texture, luminance and size.

You could pick something subtle that will match or coordinate with your ornaments or something contrasting to really set if off. Like using burlap ribbon with traditional ornaments for a rustic look or pairing those same burlap ribbons with luxe ornaments for a modern remix.

You can definitely wrap the ribbon around your tree vertically, like a garland. That’s a beautiful, classic look. But do experiment with weaving your ribbon through the tree vertically! Here’s how:

  • Starting at the top of your tree, create a bow or just tuck the ribbon into the boughs, wrapping it around a branch to hold it.
  • Don’t pull it taut—make a little loop and tuck into the boughs again about a foot down. And instead of going straight down, pull your loop a little to the right.
  • On your next loop come back towards the left and so on, until you reach the bottom of the tree.
  • Continue your pattern throughout the tree.

How many rolls of ribbon do you need to decorate your tree?

Don’t be that woman (me again) who bought just enough beautiful gold ribbon to get halfway down and across her tree only to rush back to the craft store to find that particular roll out of stock for the rest of the season.

Now I err on the side of buying a little more ribbon than I need. I can always use the extra to wrap around other holiday décor like candles, wreaths and holiday floral arrangements.

Here’s how much ribbon you need based on the size of tree you have. And remember, these would be 10-yard rolls of ribbon.

  • 6–7-foot tree: 2–3 rolls
  • 9-foot tree: 3–4 rolls
  • 12-foot tree: 5–6 rolls

Once your ribbon is all tied in a bow (I know you saw what I just did there) you can add pretty picks, sprigs, sprays and other fun or floral elements to add interest to your tree. I usually introduce a few here but wait until my tree is nearly finished to add most of them, depending on empty spaces that need to be filled.

#

5. How to Hang Christmas Tree Ornaments: Put an Ornament on It

15981 Tree 6

There are rules for putting your ornaments on your tree. And I break every one of them. But to break them successfully, you still need to know what they are.

Rule #1

When it comes to professional Christmas tree decorating tips, most people will say start with bigger ornaments first. And that’s good advice because big ornaments fill up space and give you a clear sense of where you can artfully place your other ornaments. But don’t feel like you have to hang your biggest ornaments.

You can always tuck them deep into the boughs to fill space and add luminance inside the tree. And keep in mind that your biggest ornaments will generally go on the biggest part of the tree and the smaller ones will go on the top.

But…you know I gotta freestyle. I put respect on the big ornaments’ name, but I start with a few smaller ornaments—the ones I love the most and want to feature prominently. Like the glass ornaments from the first Christmas tree I ever put together for my little family. The limited-edition, gold and pearl drop ornaments I found years ago. Handmade ornaments from a European Christmas market. Or ornaments dear friends have given me because they know that I’m choosy about my ornaments.

I put these front and centre, top to bottom on my tree. Then I build my statement around them. I generally follow the rule about placing bigger ornaments toward the base of the tree, but if there’s a space calling for one of my smaller specialty ornaments, I’ll fill it.

Keepsakes? You know I’ve got those.

So. I dedicate one entire downstairs tree to Keepsakes because Keespakes are literally “kept memories” for me and my family—memories of movies we’ve watched together, people and things we care about, important “firsts,” cultural moments that fascinated us or just stuff we like.

There’s a Green Bay Packer quarterback and his whole line of defence for the sports-lover in our house. Captain Kirk, Spock and the beautiful Uhura are all hanging out for the Star Trek nerd I live with. And, for me, it’s all the things. I love them all, from Wizard of Oz (hello, childhood!), to Sesame Street (innocence+fun+childhood), to Santas of every configuration (magic+kindness+childhood!).

Absolutely no shame in my game. Ever.

Rule #2

Don’t feel like you need to spend a thousand dollars on Christmas ornaments. Because trust and believe, some can get quite spendy. Craft and dollar store ball ornaments come in every colour and sets of various sizes (4–50) that can average less than one or two dollars per ornament. These are your “reliables.” You can build a lot of looks with them, and they are often on sale. It’s perfectly okay to have one or two more expensive ornaments on a tree that’s 99% discount. You’re trying to make your home beautiful, not go broke.

For example, you could buy a bunch of small frames from the dollar store and put pictures of your family, past and present, in them to mix amongst your ball ornaments. You could put the Christmas cards you’ve received or greeting cards you cherish from loved ones on ribbons and hang those with your chosen ornaments to tell a family story. Or you could put cute Keepsake Ornaments on the tree for fun.

Rule #3

While I’d suggest not hanging your ornaments in straight lines vertically or horizontally—think about making zigzag patterns with them instead—you really should experiment and figure out what looks best to you. Check for colour and shape balance, and remember to use Nicole’s squint trick at each step of the game. You want your tree to be magical from a distance and pull people in closer to see the special things you’ve done.

Pro tip: If there are things on the tree that might tempt the kiddos or fur babies to snack, double secure with floral wire.

#

6. The Final Touch: The Christmas Tree Skirt

This is the last step, but it’s another fab opportunity to get really creative and go bold. I know I’ve said the thing about “many options” many times. But it’s still true.

Tree skirts come in many sizes, colours, fabrics and themes. You can easily find ones that fit your theme—either coordinating with your ornaments and topper, adding some contrast, or mimicking snow or other winter elements. They can be the beautiful finishing touch for your tree.

Tree Skirt Options

Truth? I haven’t bought a tree skirt since the Declaration of Independence was written because there are so many other ways you can finish your tree. For the last few years, I’ve been wrapping my tree bottoms in deep brown or white luxurious looking (but cheap) faux fur throws that you can find at nearly every store that’s not a supermarket. They make my trees look gorgeous and invoke a feeling of winter warmth and luxury.

But you can also put your tree in a big basket filled with faux snow or a tree collar. Christmas tree collars can look like rustic wooden boxes, basket weaves, vintage tin washtubs, or red, silver and gold planters. My tree collar is a mosaic of gold, silver and glass. I have fun every year making a topper to match how gorgeous it is.

Pro tip: If you use a fabric cover at your tree bottom, don’t leave it looking flat and lifeless. If you’ve sandbagged or weighted your tree, arrange your skirt over the weight. It will give the area under your tree a nice dimensional look. And if your tree is not weighted, use gift tissue or towels underneath to suggest the flow of snowdrifts. If you use a tree collar or basket, they should cover your weights well.

If all this feels a little overwhelming, let me share a secret: I didn’t consider myself a particularly crafty, artsy or visually creative person when I started. To this very day I can’t draw. Or cut a straight line. Or fold paper in half. (Don’t ask my daughter about times I “helped” her with elementary school art projects. Just.don’t.do.it.)

But I started small and mastered a trick each holiday season so that now I can bring my Christmas tree vision forward and make it real. It’s not perfect by anybody’s standards but mine. And that’s what counts.

So teach yourself a little something. Experiment and don’t be worried if something turns up a little crooked or comes out a little wonky. Go ahead and put your style on it. Because it’s all about your joy.

Merry Christmas Tree Time, friends!